You want a dedicated space for getting ready in the morning — somewhere to sit, do your makeup, sort your hair, and start the day with some sense of order. But the bedroom is already working at full capacity. The bed takes up most of the room, the wardrobe fills the remaining wall, and the idea of fitting a dressing table into what is left feels optimistic at best and delusional at worst.
This is one of the most common small bedroom frustrations, and it is solved more often than people expect — not by finding more space, but by using existing space differently. A dressing table does not require a dedicated room, a generous alcove, or even a spare wall. It requires a surface, a mirror, adequate light, and a storage solution for the products you use daily. All of these can be achieved within the footprint of even the smallest bedroom, using three layout approaches that consistently work regardless of how limited the space appears.
This guide covers those three layout solutions in detail, how to choose the right size unit, how to solve the mirror problem when wall space is limited, how to create storage without drawers, how to light a dressing table correctly, and how to implement the most space-efficient dressing table solution available — the wardrobe nook hack that disappears completely when not in use.
The 3 Small Bedroom Dressing Table Layouts That Always Work
Before looking at specific products or accessories, the layout decision comes first. In a small bedroom, the position of the dressing table determines everything else — which mirror solution works, how much storage is achievable, and whether the table integrates naturally into the room or creates a sense of visual clutter. Three layouts consistently succeed in small bedrooms where conventional approaches fail.
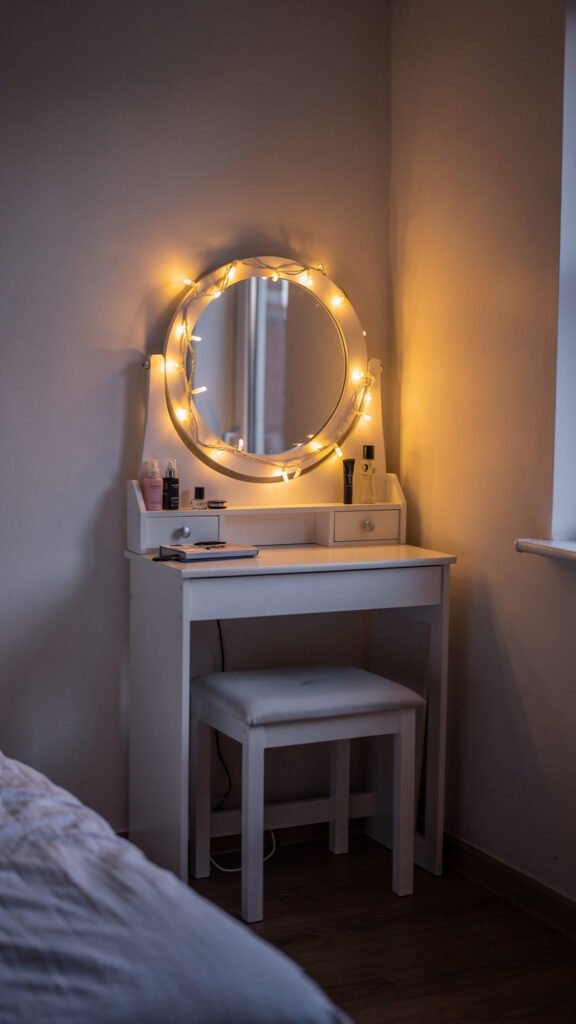
Layout 1: The Corner Setup
The corner is the most underused surface in almost every small bedroom. Corners are typically left empty because people think of furniture as something that goes against a flat wall — and a corner is not a flat wall. But a dressing table placed into a corner uses dead space that no other piece of furniture can occupy, and it does so with a footprint that is smaller than any other layout option.
A corner dressing table requires only 18 inches of depth on each wall — significantly less than the 24-inch depth of a standard wardrobe — and it creates a naturally enclosed, focused area that feels like a dedicated getting-ready nook rather than a piece of furniture balanced in whatever space remains. Corner dressing tables are available specifically designed for corner placement, or a standard narrow desk can be positioned diagonally across a corner with equal effectiveness.
The practical minimum for a functional corner setup is approximately 30 inches along each wall from the corner point. A mirror mounted or placed on one of the two walls within the corner completes the setup without requiring any additional wall space beyond what the corner already provides.
Layout 2: The Floating Wall Mount
A floating wall-mounted shelf used as a dressing table surface has no floor footprint whatsoever. It is simply a shelf — between 30 and 48 inches wide and 14 to 16 inches deep — mounted at the correct height for sitting at, with a stool or chair that slides fully underneath when not in use. When the stool is tucked in, the entire setup occupies no floor space at all. It reads as a shelf rather than a piece of furniture, which means it integrates into a small bedroom without making the room feel smaller.
The floating shelf approach works on any wall that has 30 or more inches of uninterrupted horizontal space — including narrow walls between doors, the wall above a radiator in some configurations, and sections of wall between a wardrobe and a window that are too narrow for any freestanding furniture. The shelf should be mounted at a height of 28 to 30 inches from the floor, which corresponds to standard desk height and is appropriate for seated use with a standard chair or stool.
A mirror placed on the wall directly above the shelf — or a tabletop mirror sitting on the shelf surface — completes the setup. A single power outlet within reach of the shelf position allows for a lighted mirror or styling tools without trailing cables across the room.
Layout 3: The Wardrobe Nook
The wardrobe nook is the most space-efficient dressing table solution available in a small bedroom, and it is the most overlooked. It involves converting the interior of an existing wardrobe — or one section of a larger wardrobe — into a dressing area. A fold-down shelf acts as the surface. A mirror mounted on the inside of the wardrobe door provides the mirror. When the wardrobe door closes, the entire dressing table disappears. The bedroom looks exactly as it did before the dressing area existed.
This layout is covered in full detail in the final section of this guide, including the specific dimensions and components required. For any bedroom where floor space is genuinely too limited for any freestanding surface — studio apartments, single rooms in shared houses, rooms that must function as both bedroom and living space — the wardrobe nook is the solution that makes a dressing table possible when nothing else does.
Choosing the Right Size Dressing Table for a Small Bedroom
The most common sizing mistake when buying a dressing table for a small bedroom is choosing a unit that is functional as a piece of furniture but physically too large for the space available. A dressing table that fits in the room but leaves insufficient clearance around it — for the chair, for the door, for movement past it — creates more frustration than the absence of a dressing table would.
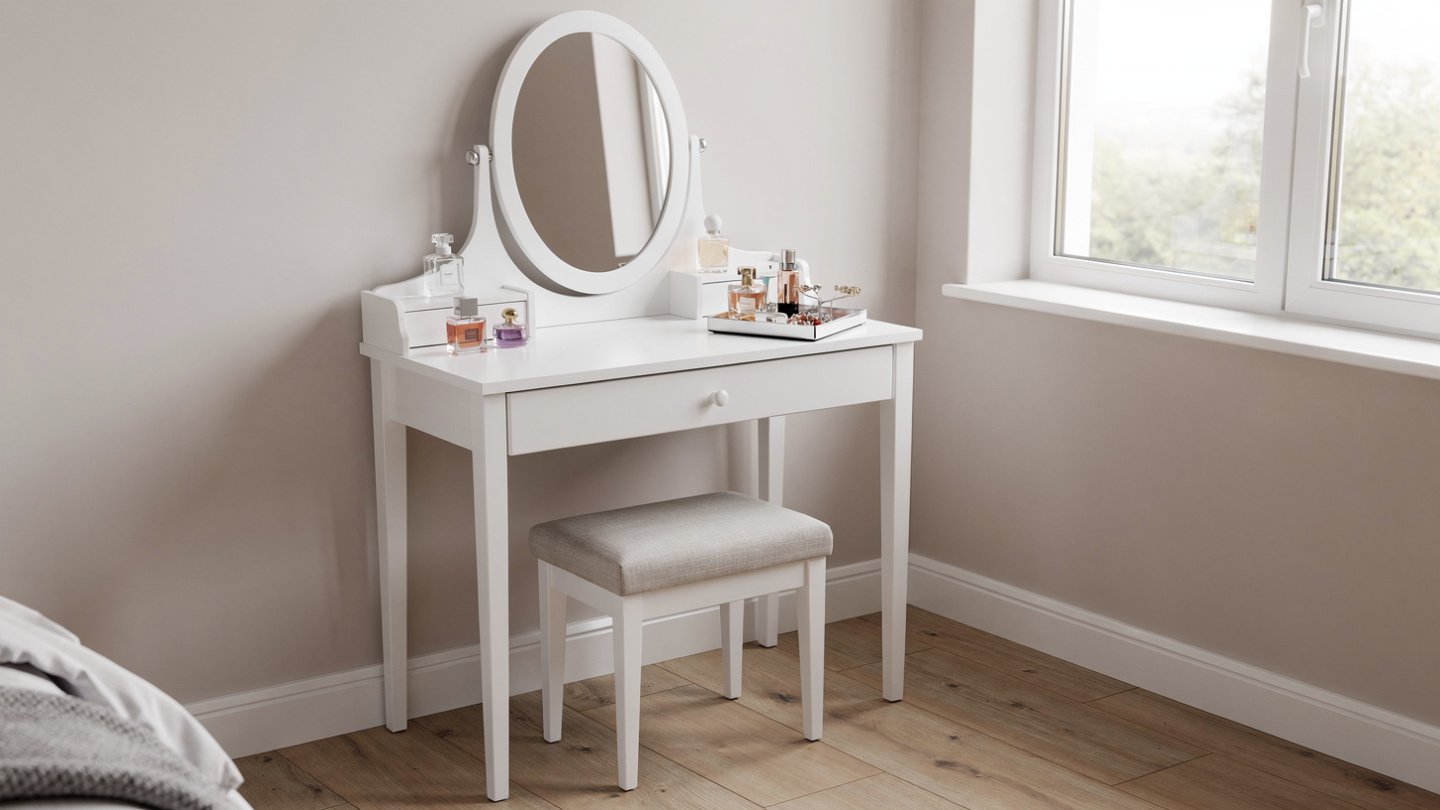
The functional minimum dimensions for a dressing table are 30 inches wide and 14 to 16 inches deep. At these dimensions, the surface is large enough to accommodate a mirror, a small organiser, and the products in daily use, while the depth is shallow enough to work against most walls without obstructing movement significantly. Any dressing table narrower than 30 inches begins to feel cramped in use, regardless of how good it looks in a product photograph.
When measuring the available space for a dressing table in a small bedroom, measure not just the width of the wall space available but also the clearance in front of the intended position. A dressing table requires a minimum of 36 inches of clear space in front of it for a chair and the ability to sit and stand comfortably. If the space in front of the intended position is occupied by the bed, a door swing, or a walkway, the dressing table will create a circulation problem even if it physically fits against the wall.
For the smallest bedrooms — those where even 30 inches of wall space and 36 inches of front clearance cannot be found simultaneously — the floating shelf approach or the wardrobe nook will always be more practical than any freestanding unit.
Specific products worth knowing about for small spaces: the IKEA MICKE desk at 28 inches wide works well as a compact dressing table with the addition of a mirror. The IKEA ALEX drawer unit at 14 inches deep can be used as a dressing table surface when paired with a wall-mounted shelf above, and its shallow depth makes it unusually compatible with small bedrooms. The IKEA MALM dressing table is specifically designed for this purpose but at 47 inches wide requires more wall space than many small bedrooms can provide — check the dimensions carefully before ordering.
The Mirror Problem: What to Do When There Is No Wall Space
In an ideal setup, the dressing table mirror is mounted on the wall above the surface — large, stable, well-positioned, and freeing the table surface from having to accommodate a stand. In a small bedroom, wall space for a dedicated mirror is frequently not available. The wall above the dressing table position may be occupied by a window, an existing shelf, a radiator valve, or a door frame. Alternatively, the floating shelf or wardrobe nook approach may make wall-mounted mirrors impractical.
Three mirror solutions work reliably when wall mounting is not an option:
A tabletop mirror that folds flat. A folding tabletop mirror sits on the dressing table surface and folds down to a thin profile when not in use, taking up minimal depth on the shelf. Folding mirrors are available in both standard and illuminated versions and provide adequate reflection for most makeup and hair tasks without requiring any wall attachment. The limitation is that they reduce the usable surface area of the table while in use — which is a meaningful constraint on a narrow surface.
A clip-on mirror attached to the desk edge. Clip-on mirrors attach to the front edge of the dressing table surface with a spring clamp and can be rotated to the correct angle for use and folded down flat when not needed. They occupy no surface space at all when in use and fold entirely out of the way when not. This is the most space-efficient mirror solution for a narrow dressing table surface.
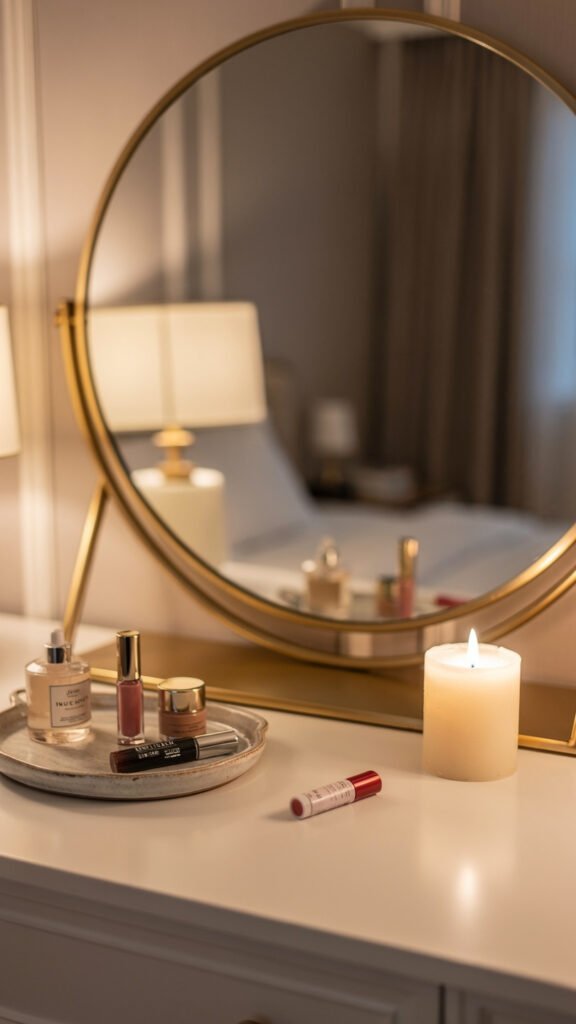
A swing-arm wall-mounted mirror. A swing-arm mirror mounts to the wall beside rather than above the dressing table — on the adjacent wall of a corner setup, for example, or on the side wall of a wardrobe. When in use, the arm extends to position the mirror in front of the face. When not in use, it folds flat against the wall, occupying a footprint of less than 4 inches. Swing-arm mirrors are particularly effective in corner setups where the wall beside the table is always within easy reach.
Whatever mirror solution you choose, prioritise mirror position over mirror size. A small mirror at the correct height and angle — directly in front of the face at eye level when seated — is more useful than a large mirror positioned at the wrong height or angle. The correct seated eye level for most adults is approximately 48 to 52 inches from the floor.
Smart Storage on a Dressing Table When You Have No Drawer Space
A dressing table without drawers — which includes floating shelf setups, most fold-down solutions, and many compact freestanding units — requires an alternative approach to product storage. The goal is to keep the daily-use items accessible without covering the surface in scattered products, which reduces the usable space and creates the visual chaos that makes small bedrooms feel smaller.
Five storage solutions work particularly well for drawer-free dressing tables in small bedrooms:
A tiered makeup organiser on the surface. A two or three-tier acrylic or bamboo organiser placed at one end of the dressing table surface provides organised, visible storage for the products used most frequently. Tiered organisers use vertical space rather than spreading products horizontally across the surface, which preserves the working area of the table. Choose a size that occupies no more than one-third of the total surface width.
A magnetic strip on the wall above. A small magnetic strip — the type designed for kitchen knife storage — mounted on the wall directly above the dressing table provides hanging storage for metal-barrelled items: bobby pins, hair clips, tweezers, nail scissors, and any tool with a metal component. Items hang vertically on the strip and are instantly visible and accessible without occupying any surface space.
A small wall-mounted spice rack as a product shelf. A narrow wall-mounted spice rack — typically 4 to 6 inches deep and available in various widths — mounted on the wall above the dressing table provides a dedicated shelf for smaller products: lip balms, mascaras, eyeliners, and travel-size items. The shallow depth means it does not project significantly from the wall, and its specific purpose as a product shelf keeps it from accumulating non-dressing-table items.
Under-table hanging pouches. Fabric pouches or organisers that hang from the front edge or underside of the dressing table surface provide concealed storage for bulkier items — hair dryers, straighteners, styling tool cords — without adding any visual clutter to the surface or the room. They are particularly effective on floating shelf setups where the underside of the shelf is accessible.
Stackable acrylic trays on the surface. Stackable flat trays — two or three inches deep and sized to hold a specific product category — can be stacked vertically beside the mirror rather than arranged horizontally across the surface. This approach keeps product categories separated and accessible while using the vertical dimension of the surface rather than the horizontal one.
Lighting: The One Thing Most People Get Wrong

Of all the elements of a dressing table setup, lighting is the one most consistently overlooked and the one that makes the greatest practical difference to how useful the space is. A perfectly organised dressing table with a well-positioned mirror and excellent storage is still frustrating to use if the lighting is wrong.
The fundamental lighting principle for a dressing table is that the light source must illuminate the face from the front, not from above. Overhead lighting — including ceiling fixtures, recessed downlights, and pendant lights — casts light downward onto the top of the head and creates shadows on the face. This is the lighting condition that makes makeup application inaccurate and hair styling difficult, because the face is in partial shadow in the exact area where precise vision is needed most.
Front-facing light at approximately face height eliminates this shadow entirely. The face is evenly illuminated from the direction it is being looked at, which makes every task performed at the dressing table — makeup, skincare, hair styling, contact lenses — significantly easier and more accurate.
Four front-facing lighting solutions work without any electrical installation or rewiring:
A Hollywood-style bulb mirror. A mirror with LED bulbs built into the frame around the perimeter provides even, diffused, front-facing light at face height. Hollywood mirrors are available in both plug-in and rechargeable battery-operated versions, making them fully practical in any bedroom regardless of outlet position. The quality of light they provide is genuinely excellent — even, warm, and shadow-free. They are the single best lighting solution for a dressing table in a small bedroom.
A clip-on ring light. A ring light attached by clip to the top of a tabletop mirror provides front-facing, diffused illumination at face height. Ring lights are inexpensive — typically under $25 — rechargeable, and highly portable. The circular light source provides even illumination with minimal shadow. The limitation is that a ring light on a small tabletop mirror can feel precarious if the mirror is lightweight or unstable.
Two small lamps positioned on either side of the mirror. Two matching small lamps placed on either side of a tabletop or wall-mounted mirror create a balanced, bilateral light source that eliminates facial shadows effectively. This setup requires surface space for two lamp bases, which makes it most practical on wider dressing table surfaces. The lamp shades should be at approximately face height when seated, not significantly above or below.
LED strip lighting behind or around the mirror. An LED strip light adhered to the back edge of a tabletop mirror or around the perimeter of a wall-mounted mirror creates a halo of diffused back-lighting that reduces the contrast between the mirror and the surrounding wall and improves the overall lighting quality of the dressing area. It works best as a supplement to another light source rather than as the primary illumination, but it significantly improves the atmosphere of the dressing area at very low cost.
When choosing any dressing table light source, aim for a colour temperature of 3,000K to 4,000K. Below 3,000K the light is too yellow and warm, which can cause makeup colours to appear different in daylight. Above 4,000K the light becomes cool and clinical, which is unflattering. The 3,000K to 4,000K range produces a neutral white light that is accurate to daylight conditions and flattering to skin tones.
The Wardrobe Nook Hack: The Most Space-Efficient Dressing Table Setup

The wardrobe nook is the dressing table solution for bedrooms where no other solution fits. It requires no additional floor space, no additional wall space, and no permanent modification to the bedroom. When the wardrobe door is closed, there is no visible dressing table in the room at all. When the door opens, a complete, functional getting-ready space is revealed — surface, mirror, storage, and lighting — ready to use immediately.
Here is how to implement it step by step.
Step 1: Identify the right wardrobe section. The wardrobe nook works best in a freestanding wardrobe with a full-length door — a single door section of a double wardrobe, or one half of a two-door wardrobe. The section selected should be at least 18 inches wide internally and ideally 20 to 24 inches. It does not need to be the full wardrobe — the other door sections continue to function as clothing storage.
Step 2: Install a fold-down shelf as the surface. A fold-down wall bracket shelf — the type designed for use as a fold-away desk — mounted on the interior back wall of the wardrobe section at a height of 28 to 30 inches from the floor creates the dressing table surface. When folded up, it lies flat against the back wall of the wardrobe and allows the door to close normally. When folded down, it projects into the wardrobe interior and provides a surface for all dressing table activities. Fold-down brackets are inexpensive, widely available, and require only four screws into the wardrobe back panel.
Step 3: Mount a mirror on the inside of the wardrobe door. A mirror adhered or mounted to the inside face of the wardrobe door is positioned directly in front of the seated user when the door is open, at exactly the correct distance and angle for dressing table use. The door itself provides the mirror position without requiring any wall mounting. Use adhesive mirror tiles or a lightweight frameless mirror attached with mirror fixings or strong adhesive strips.
Step 4: Add lighting inside the wardrobe. A battery-operated LED strip light or a small rechargeable LED puck light adhered inside the wardrobe above the fold-down surface provides the front-facing illumination needed for accurate makeup and styling. The wardrobe interior concentrates the light effectively, meaning less light is needed to achieve good illumination than in an open room. A warm white LED strip at the top of the wardrobe door frame, shining down onto the mirror and surface, works well in most configurations.
Step 5: Organise the interior for dressing table use. The walls inside the wardrobe section — beside and above the fold-down surface — can be fitted with small hooks, magnetic strips, or adhesive organisers for product storage. The vertical space above the folded-down surface is accessible from a seated position and provides wall storage that would not be available in any open-room dressing table layout. A small caddy or organiser placed on the fold-down surface itself holds the daily-use products within reach during use.
When the session is done, products go back into the in-wardrobe organisers, the fold-down shelf goes back up, and the wardrobe door closes. The bedroom is exactly as it was before. No dressing table visible. No floor space occupied. No visual clutter added to the room.
For studio apartments, shared bedrooms, children’s bedrooms that double as study spaces, and any other situation where a dressing table feels impossible, the wardrobe nook makes it possible.
Frequently Asked Questions
What is the smallest size a dressing table can be?
The functional minimum for a dressing table surface is 30 inches wide and 14 inches deep. At these dimensions the surface accommodates a mirror, a small organiser, and the products in daily use with a usable working area in between. Surfaces narrower than 30 inches become cramped in practice regardless of how well organised they are. For bedrooms where even 30 inches of wall space is not available, a floating shelf of these minimum dimensions or a wardrobe nook conversion are the appropriate solutions.
Where should a dressing table be placed in a small bedroom?
In a small bedroom, the most effective positions for a dressing table are a corner — which uses dead space no other furniture can occupy — or against the wall with the shortest horizontal span, which is usually the wall behind the bedroom door. Avoid placing the dressing table in the primary walking route through the bedroom, in front of a radiator, or in a position where the chair cannot be pulled out fully without hitting another piece of furniture. The corner layout is the most space-efficient placement in the majority of small bedrooms.
How do I light a dressing table without wiring?
The most effective no-wiring dressing table lighting solution is a Hollywood-style LED bulb mirror in a rechargeable battery-operated version — it provides excellent front-facing illumination at face height with no electrical installation required. A clip-on ring light attached to a tabletop mirror is a lower-cost alternative. Two small plug-in lamps positioned on either side of the mirror, plugged into a nearby wall outlet, are a third option that requires no installation and provides balanced bilateral illumination.
Can I use a regular desk as a dressing table?
Yes — a regular desk makes an excellent dressing table provided the dimensions are appropriate. The ideal desk for dressing table use is 28 to 36 inches wide, 14 to 20 inches deep, and 28 to 30 inches high. A desk with at least one drawer is particularly practical as it provides storage for products below the surface. The IKEA MICKE, ALEX, and LINNMON ranges all offer desk options within these dimensions that work well as dressing tables in small bedrooms when paired with an appropriate mirror and stool.
Final Thoughts
A dedicated getting-ready space in a small bedroom is not a luxury that requires a room upgrade to achieve. It is a practical necessity that can be created within the existing footprint of almost any bedroom using one of three layout approaches — the corner setup, the floating wall mount, or the wardrobe nook — combined with the right mirror solution, an appropriate storage approach for the available surface space, and front-facing lighting that makes the space genuinely functional rather than merely decorative.
The wardrobe nook, in particular, deserves more attention than it typically receives. It is the solution that makes a dressing table possible in bedrooms where every other approach fails, and when implemented correctly it occupies zero floor space, zero wall space, and zero visual presence in the room when not in use.
Start with the layout decision — that choice determines everything that follows. Measure carefully, choose a surface size appropriate to the available space, solve the mirror and lighting problems with the no-installation options available, and build the storage solution around the surface you have rather than the surface you wish you had. The result will be a getting-ready space that functions well every morning, regardless of how small the bedroom around it is.